My Sci-Fi TV & Film Loose Figures - Family Guy, Buffy & Futurama

Snaketibe

Grand Master
Supporter
Joined
Jan 16, 2016
Messages
5,982
Reaction score
845
Location
United Kingdom
To prove I'm not all about Star Wars, and shamelessly inspired by other similar postings (e.g. subzero's excellent http://starwarsforum.co.uk/viewtopic.php?f=7&t=34767), here are some pics of some of my Sci-Fi TV & Film related loose figures, shoehorned into one of my custom cabinets. It's quite a mixed bag of figures spanning a fair few years, but hopefully some of you may enjoy seeing a little Futurama, Babylon 5, LOST, Matrix, Aliens, Predator, AVP and Buffy bits, with a few other oddments thrown in for good measure :-)

Hope you like them!

01 - Cover On.jpg

02 - Cover Off.jpg

03 - Futurama.jpg

04 - B5, AVP & LOST.jpg

05 - B5, AVP & Matrix.jpg

06 - Matrix & Aliens.jpg

07 - Buffy.jpg
 
It's been a good day on here for looking at other non SW collections and this is another great collection. I don't quite remember Buffy's boobs being that pronounced and am finding it hard to look away :?

Ian
 
Palifan said:
It's been a good day on here for looking at other non SW collections and this is another great collection. I don't quite remember Buffy's boobs being that pronounced and am finding it hard to look away :?

Ian
I have absolutely NO IDEA what you mean!
:wink:
 
Loads going on there. Won't profess to recognise a lot of them, but the Futurama figures are my favourite.

Great collection!
 
Thanks for the nice comments everyone. It's certainly a mixed bag in terms of what's on display in this cabinet, but I've tried to group them wherever possible :-)

The Sideshow Buffy statue is my favourite item here, although I am extremely fond of the Babylon 5 figures (rubbish likenesses, though they most certainly are! :lol: ), but I will always have a soft spot for anything Futurama in any form!
 
Nice cabinet you have made, can I ask how you have mounted the glass shelves onto the twin slot supports? are they just resting on top?

Really like those Futurama figures though, great collection.
 
Bunglebubs said:
Nice cabinet you have made, can I ask how you have mounted the glass shelves onto the twin slot supports? are they just resting on top?

Really like those Futurama figures though, great collection.
Thanks :-).

The glass is indeed just resting on the shelf brackets. In this cabinet, it's 6 mm glass with arrised edges all round (because it's a damned sight cheaper than polished edges and frankly, the difference isn't noticeable enough to matter in cabinets where your attention should be drawn to the contents, not the glass shelves ;-)), and hence is relatively heavy, where the figures are relatively light. Once in position, the shelves don't easily move or slide unless you knock them, and all my cabinets have perspex front covers preventing anything getting anywhere near the shelves :-)

In case it helps or interests you (or others), I've provided a few more photos highlighting the shelf supports... plus it gives me a great excuse to show the Alien Queen from another angle :D

BTW, your eyes are not deceiving you; the top shelf of the Futurama figures does indeed have shelf supports which are too long. I'd run out of short ones and had to use some longer spares I had, but taking these new photos today reminds me that I need to swap them out for some shorter ones! :oops:

Brackets 01.jpg

Brackets 02.jpg

Brackets 03.jpg

Brackets 04.jpg
 
Hi Snakebite, yes very useful thankyou. Some of the supports look like there is a bolt of some kind going through them, might be my eyes though :lol:
I think I would have perhaps placed some kind of material between the glass and the support like rubber or those sticky pad things you get in packaging. None the less it is a great display and one to be proud of. I have a few various sized items and ideas like this one of yours are very helpful :)
 
Think i'm too focussed at times.. I didn't even know that they made Futurama toys and they're really cool.. some might say Toyetic... :wink:
 
Bunglebubs said:
Hi Snakebite, yes very useful thankyou. Some of the supports look like there is a bolt of some kind going through them, might be my eyes though :lol:
I think I would have perhaps placed some kind of material between the glass and the support like rubber or those sticky pad things you get in packaging. None the less it is a great display and one to be proud of. I have a few various sized items and ideas like this one of yours are very helpful :)
I really do understand your concerns about placing something between the supports and the glass, but trust me, they really aren't necessary if the cabinet is enclosed. If you intend to use this shelf system without a cover. i.e. where the shelves might be knocked by accident, then yes, I would absolutely recommend securing the shelves by some additional means :-). However, I have built several cabinets using this shelf system over the years, all with unsecured glass shelves, but all with perspex front covers. You might be surprised to learn that I've never had any problems of any kind with the shelves. The glass doesn't even get scratched. Glass (of the correct thickness!) is a lot tougher than most people think, and this is not toughened glass either, as that simply isn't necessary for the weight and stress it will support. If the cabinet front covers were glass then they would definitely need to be toughened, but after one extremely costly experiment where I fitted several new cabinets with toughened glass fronts and had one pane explode for no apparent reason in the middle of the night (which, I was very surprised to learn, toughened glass can do on rare occasions for a few different reasons, including the presence of a tiny amount of nickel sulphide as an impurity), I immediately switched back to perspex and swallowed the cost. I'm still thankful to this day that I had nothing valuable in the cabinets when this happened:

Explosion.jpg


I shudder to think of the cost if I'd had anything vintage in there when the pane went pop! Luckily, the cabinets had only just had the glass pane inserting and I hadn't had a chance to start filling it with any display items, but if it had blown just a few weeks later... :shock:

Needless to say the experience unnerved the hell out of me, and I will never use toughened glass in my cabinets again. Fortunately, ordinary float glass (i.e. untoughened) cannot suffer the same catastrophic failure as toughened, so it is perfectly safe for the shelves. Yes, I was incredibly unlucky to have an exploding piece of toughened glass, but the very fact that it actually happened to me irreversibly means I refuse to ever use it again.

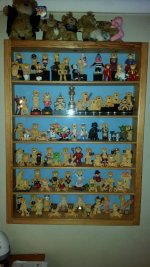
As for your comments about it looking like bolts are going through some of the shelves, whilst I'm not sure which photo(s) you are referring to, I can assure you there aren't any, honest! This particular shelving system has holes in the underside of the shelf supports to allow screws to be used to fix wooden shelves to the supports from beneath. Obviously however, that isn't an option with glass shelves, so I don't use them ;-)

If you are thinking about making your own cabinet, I would definitely encourage you to do so. I will happily provide any tips or advice if you have any questions you think I can assist with. I'm actually in the midst of building another cabinet right now, and for the first time I am photographing every single stage of the process (I have done before and after shots before). I thought it might make for a useful / interesting guide of sorts for forum members who fancied a go at building their own. If I do post that, it won't be for a few weeks yet though, so if you have any questions in the meantime, feel free to post them or PM me :-)

Jeremy

PS - My handle's snaketibe, not snakebite... I won't bore you with why, but it's not a typo ;-)
 
SAVORY100 said:
Think i'm too focussed at times.. I didn't even know that they made Futurama toys and they're really cool.. some might say Toyetic... :wink:
Glad you like them :-). Moore Action Collectibles (MAC) made Fry, Leela, Bender and the Planet Express Ship many years ago (plus a Chef Bender and Swimsuit Leela pair of repaints). However, Toynami then picked up the license years later and redid the same figures (but not the ship) using the old molds, but then went on to make lots of the other characters too. The MACs are at the top left of my cabinet Futurama display (and the ship at the bottom left), the rest are Toynamis.
 
Snaketibe said:
PS - My handle's snaketibe, not snakebite... I won't bore you with why, but it's not a typo ;-)

My appologies, that's what I get for skimming over too quickly.

Thankyou for all the useful information it is appreciated. My joiney skills aren't the greatest although kitchen fitting, plumbing and tiling are. My mothers partner is a cabinet maker so im sure he could put together the wooden surround part for me. Im thinking of eventually getting a deeper one so that I can use it to display my graded mailer packs in stepped shelves similar to what you have and also for my baggies, and then another cabinet for all the other random collectables I have which would take a bit of planning to display them all as they are all different shapes and sizes.

I would be interested in seeing your step by step process though should you decide to take the time to post it all. Im well aware of the time it would take to do this but I for one would appreciate it should you choose to do so. That must have been a nightmare the glass shattering like that but the main thing is nobody was hurt by it. The background colour you chose for your cabinet also works very well for those figures, its always one of the hardest things to do is finding a colour that will not clash when you have so many items in the cabinet :lol:
 
Bunglebubs said:
Snaketibe said:
PS - My handle's snaketibe, not snakebite... I won't bore you with why, but it's not a typo ;-)

My appologies, that's what I get for skimming over too quickly.

Thankyou for all the useful information it is appreciated. My joiney skills aren't the greatest although kitchen fitting, plumbing and tiling are. My mothers partner is a cabinet maker so im sure he could put together the wooden surround part for me. Im thinking of eventually getting a deeper one so that I can use it to display my graded mailer packs in stepped shelves similar to what you have and also for my baggies, and then another cabinet for all the other random collectables I have which would take a bit of planning to display them all as they are all different shapes and sizes.

I would be interested in seeing your step by step process though should you decide to take the time to post it all. Im well aware of the time it would take to do this but I for one would appreciate it should you choose to do so. That must have been a nightmare the glass shattering like that but the main thing is nobody was hurt by it. The background colour you chose for your cabinet also works very well for those figures, its always one of the hardest things to do is finding a colour that will not clash when you have so many items in the cabinet :lol:
No apology required. It's my fault for choosing such an easily misread user name! You're not the first and won't be the last person to read it as Snakebite! :-D

With all my cabinets, I made the conscious decision not to use woodwork joints (dovetail, etc.), as I simply don't have the skills. However, I deduced that, for my requirements, I didn't need them. When I made my first cabinets (see http://starwarsforum.co.uk/viewtopic.php?f=1&t=34623) I simply used fixing blocks and screws to hold the frame together, along with the hardboard back which, when tacked in place, adds stability and rigidity. I refined that design in subsequent cabinets by using angle brackets, either internally or externally, as appropriate, along with screws through the ends. My intention for all bar those shown in the link above was always to paint them as I personally am not a fan of bare wood. That of course played into my hands as the absence of true woodwork joinery could therefore be disguised with paint ;-)

You're absolutely right about the need to plan your cabinet before making it. I always try to work out how much display space I'm trying to create, and then work forwards from there in terms of the width, height and depth of the frame. All of mine are however wall-mounted. I could make free standing ones, but I prefer them to be either off the floor and out of the way, or else floor to ceiling, but still fixed to the wall so they cannot fall over :-)

I will do my best to post the guide I mentioned, although I'm not sure which section it would be most appropriate to post it in. Technically it's 'Off Topic' as the cabinet I'm building won't actually be for anything Star Wars, however quite obviously the technique can of course be applied just as easily to a cabinet meant for Star Wars :lol: . I'm open to suggestions for the most appropriate home for it.

As for the exploding glass, yes I'm not only glad that it had nothing in it at the time, but also that I wasn't standing anywhere near it! It let go at 2:00 am and I thought someone had thrown a brick through my window! To say it shocked me is an understatement!

Thanks for the compliment regarding the cabinet colour. You are absolutely correct about needing to choose the colour carefully, as it would be easy for items to become lost in the background. Although I chose black for those first cabinets in the link above, I'd never do so again; it's much too dark and unforgiving, and hides too much detail. The purple of the cabinet in this thread however does seem to work quite well, although I will be the first to admit it wouldn't be to everyone's taste! For my other cabinets I've gone for lighter colours that don't distract from or camouflage the contents, whilst also being ones I don't mind looking at! That's why I resisted the temptation to go for a bright yellow background for my vintage loose figures, as whilst it's undoubtedly a vintage colour reminding everyone of many of the cardbacks, I couldn't bear the thought of staring at that much yellow all day! :-D For the 'exploding' cabinet however, I relented and did opt for a vintage colour reminiscent of the Palitoy 30 backs and Kenner 41 backs, as it's also my favourite shade of blue :-)
 
Im sure you could post it in the showcase section afterall it will be for showing when completed :)

Look forward to seeing you posting up a blue peter esque here's one I made earlier type thread and to see how you have actually put it together. With regards to colour ive attached a photo of a cabinet I got custom made to house my collection of bad taste bears, I then painted the interior a light blue as I felt that this was the best to use so as to highlight all the figures and hopefully none of them would get lost. If you look carefully you can see some of them have a Star Wars theme (3rd shelf from the top on the right) I think black would be okay if you were to add some led lighting in it or something and there aren't expensive either. But then again as you say each to their own choice.
 

Attachments

  • bad bears.jpg
    bad bears.jpg
    87.1 KB · Views: 193
That's a great cabinet and collection! I agree the blue works really well and helps display the contents brilliantly.

Thanks for the advice on placing the guide in the Showcase section. I was tending to think that as well, but didn't want to incur the wrath of anyone who thought it didn't belong there! :lol:
 
Those Futurama figures look fantastic, very colourful, I have never seen those before either.

Thought I would have a look at what was in that collection, I think that thses are the ones that you have?
http://www.toynami.com/futurama-actionfigures.html

There are some great figures, and you seem to have most if not all, congratulations.

But the cost of boxed ones :o, it's not only Star Wars that's expensive, really nice intresting collection, in a great cabinet!
 
Mini99 said:
Those Futurama figures look fantastic, very colourful, I have never seen those before either.

Thought I would have a look at what was in that collection, I think that thses are the ones that you have?
http://www.toynami.com/futurama-actionfigures.html

There are some great figures, and you seem to have most if not all, congratulations.

But the cost of boxed ones :o, it's not only Star Wars that's expensive, really nice intresting collection, in a great cabinet!
Thanks for the nice compliments. Yes, those are the Toynami ones I have in the link you posted, and as far as I know, yes I have all the regular figures. As with many toy lines, another wave was planned at the point the line ended (which was to include Flexo, the Don Bot, Morbo & Lrrr), but with sales dropping off they never made it into production, again, as far as I know.

To be honest, I had no idea the boxed ones had become so expensive. The Toynami line ended several years ago and so when they stopped making them and there were no new ones left to buy (~£14.99 each when new, so not outrageous), I had no reason to monitor the prices on the secondary market. I suppose if they keep going up in value, there's nothing to stop Toynami cranking out a few reissues, and if Futurama ever gets recommissioned, I would probably expect them to do that anyway :-)
 
Well, it turns out there's a bit more left in the Toynami Futurama story after all! After making my last post, I decided to do a quick bit of Googling, out of curiosity. I had always known that the SDCC in 2011 featured Series (waves) 10 (Clamps and Joey Mousepad):

Wave 10.jpg


and 11 (Flexo and The Donbot):

Wave 11.jpg


plus 2 deluxe figures (Morbo and Lrrr):

Deluxe Lrrr & Morbo.jpg


plus a fantastic looking Destructor Vs Gender Bender set:

SDCC 2011.jpg


The problem is, the line was cancelled and none of these made it into production... Or so I thought! It turns out, at the SDCC 2011 the Destructor figure was available as a limited edition exclusive, but I was completely unaware of that fact at the time:

Destructor SDCC 2011 Exclusive.jpg


Furthermore, at the SDCC 2013 Toynami re-released Destructor, this time in a sweet 2-pack with the Gender Bender figure... and I am delighted to say that I now have this set. I haven't worked out exactly how I'll crowbar Destructor into my cabinet yet (it's massive!), and might actually wait until I've finished building my latest cabinet (which I am photographing the various construction stages of, and still plan to post a 'How To' or at least a 'How I Did' for any members wanting a guide for making their own cabinet. It's taking me a little longer to build than I intended, mainly because I'm hardly rushing it, but it should still be done fairly soon, hopefully). In the meantime though, here is my latest acquisition :-D:

Destructor and Gender Bender - SDCC 2013.jpg
 

Latest posts

Back
Top